Simple Workflow for Basic HTML & CSS Website
No dogma, just what I'm learning and thinking about right now.
Comments and feedback are welcome on Mastodon.
"If you're thinking without writing, then you just think you're thinking."
—Leslie Lamport
This is the first in this series of articles:
I recently had to build a very simple webpage. Just a marketing page for a SaaS startup. A single page at first, maybe a few more later. I thought about firing up Bridgetown or Jekyll or Middleman. They’re all great. But then I thought, “why not just HTML and CSS?” When was the last time I did that? At Bootcamp?
How refreshing! No <something> new command, no complicated build and deploy process, just plain old mkdir <my-project>. Why not start simple? Should I choose to switch to a static site generator later, it will still be dead simple to import my content.
Basic Directory Structure
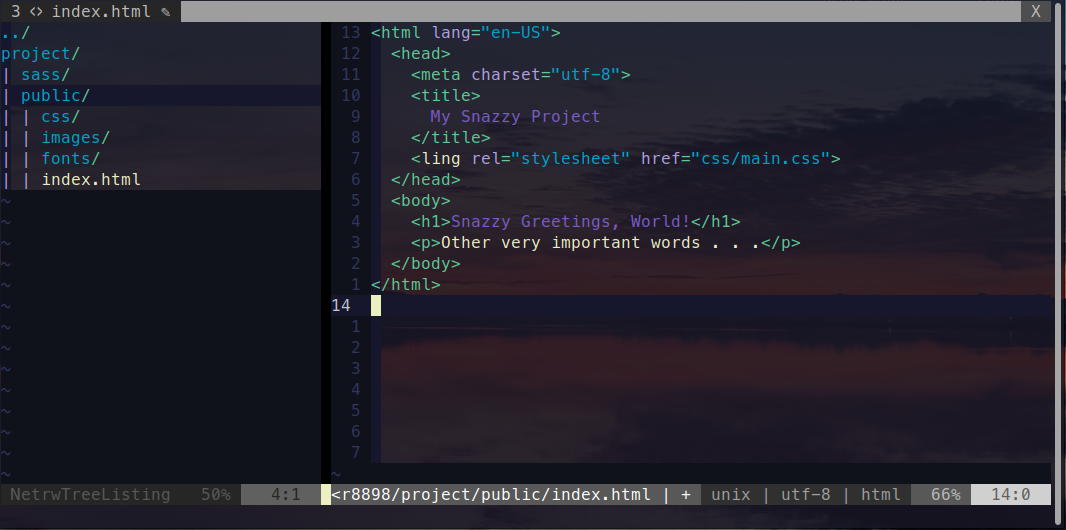
Since I’m using SASS, I first created a sass directory in the project root. Then I created a publicdirectory, also in the project root, to hold my public files (that is, the webpage itself). Inside the public directory, I created directories to hold my site assets: css, images, and fonts (so I can use a snazzy typeface and icon fonts).
At this point, my directory structure looks like this:
project
├── public
│   ├── css
│   ├── fonts
│   └── images
└── sass
SASS
Since I decided to use SASS, I will need a build step to compile SASS into CSS. I started by downloading Bulma and unzipping it to sass/bulma-0.9.4. Then I can get started by creating a main.scss file in the sass directory. The contents of this file look like this:
@charset "utf-8";

// My custom rules to override Bulma defaults

@import "./bulma-0.9.4/bulma.sass";

// Other custom rules
Using SASS
To compile my SASS files to CSS in the public/css directory, I use the following command. This command must be run from the project root.
sass --no-source-map sass/main.scss:/public/css/mystyles.css
The --no-source-map directive skips the creation of a source map file, which would not be useful in any event, since the source files are outside of the public directory, and not available to the browser.
If I want to watch the sass directory for changes and automatically re-compile the output css, I can use the following command (but I usually just compile manually):
sass --watch --no-source-map sass/main.scss:/public/css/mystyles.css
This blocks the terminal session while running. Press Ctrl-c to stop.
Finally, when you’re ready to deploy, you can output minified css using:
sass --no-source-map -style=compressed sass/main.scss:/public/css/mystyles.css
Custom Fonts
I use a Google font for my page. I import this directly from Google using an @import in main.scss.
@import url("https://fonts.googleapis.com/css?family=Caveat:400,700");
For my icon font, I need to add another SCSS file and make the font files available in the public/fonts directory. I downloaded the icon set, unzipped the files to a subdirectory in sass, and copied the font files to public/fonts/. Since this is the directory the icon font scss expects, I don’t have to edit the icon font scss files. All that’s left to do is import the font scss file with another @import command in main.scss.
@import "./path/to/font.scss";
Local Server
Well, I don’t actually have anything to serve yet, so I’ll add an index.html file in the public directory. I’ll include a style tag to use main.css.
<!doctype html>
<html lang="en-US">
  <head>
    <meta charset="utf-8">
    <title>
      My Snazzy Project
    </title>
    <link rel="stylesheet" href="css/main.css">
  </head>
  <body>
    <h1>Snazzy Greetings, World!</h1>
    <p>Other very important words . . .</p>
  </body>
</html>
Finally, to serve the contents of public locally, we can use the simple Python3 server pre-installed on most systems. Note that I must run this command from the public directory.
python3 -m http.server
My page is now available to view in my browser at localhost:8000. Best of all, since this is a simple static site, any changes I make (including recompiling SASS) only require a refresh in the browser–no server restart is needed.
And that is all!
Check out the remaining articles in this series, where I dockerize and deploy a simple static page site like this one.
