Hanami & Fly.io Hello World

No dogma, just what I'm learning and thinking about right now.
Comments and feedback are welcome on Mastodon.
"If you're thinking without writing, then you just think you're thinking."
—Leslie Lamport
I’ve been working on a project using Hanami and I wanted to get my feet wet with deploying to production. These are my first steps in that process. The purpose of this article is simply to document the steps taken to deploy a fresh Hanami app on Fly.io. There is no code, no database, no Redis, etc.
Let’s get started!
Generate the Hanami App
On my machine, I already have Hanami 2.1.0.beta1 installed. For purposes of this article, any version will do, so go ahead and gem install hanami if needed. The next step is to specify the Ruby version I want and generate the Hello World Hanami app. I use the following:
> chruby 3.2.2
> hanami new demo
Next, we’re going to cd into the project, set the project’s Ruby version, and spin up the development server. The commands to do this are as follows.
> cd demo
> echo "3.2.2" > .ruby-version
> bundle exec hanami server
If all goes well, you should be able to open a browser and point it to localhost:2300 or 127.0.0.1:2300, and see Hanami’s welcome message: “Hello from Hanami.” From this point on, I don’t intend to make any changes to this application.
Installing the Fly CLI Utility
First we will need to download the Fly.io command-line utility, flyctl. I found it here and followed the instructions to install it to my linux system. Next you will need to sign up with Fly.io and/or login to your Fly.io account. You can do this in your browser, or with flyctl using the fly auth signup and fly auth login commands. Finally, you will need to provide a credit card on your Fly.io account. This is a requirement of Fly, but we should not incur any charges as long as we remain within the usage limits of the Hobby Plan.
Launching Our Hanami Hello World
Now we’re ready to launch our Hello World app. From the app’s root directory, type fly launch and press Enter. You should receive the following prompts.
- Name your app. Only lower-case letters and hyphens are permitted. Pick something unique, as the Fly app namespace is universal.
- Setup a Postgres database? No.
- Setup a Redis database? No.
If there are no problems, you should receive a message that your app is ready to deploy, but first I want to take a look at what the fly launch command actually did for us.
Fly Configuration Files
If you are extra-observant, you may have noticed that you have two new files in your project directory: Dockerfile and fly.toml. These are configuration files created by the fly CLI. Interestingly, although Fly.io does not run containers, it uses dockerfiles to configure images, which it then runs as virtual machines. So, the Dockerfile in your project contains the configuration information to create an image, and the fly.toml file contains the additional configuration needed to spin up the virtual machine using that image.
Let’s look at the contents of these files.
Dockerfile
Following is the complete contents of the dockerfile Fly created for my demo app. We’ll go through each line to see how this works. You will note that this script uses a multistage build to reduce the final image size.
 1 ARG RUBY_VERSION=3.2.2
 2 FROM ruby:$RUBY_VERSION-slim as base
 3
 4 # Rack app lives here
 5 WORKDIR /app
 6
 7 # Update gems and bundler
 8 RUN gem update --system --no-document && \
 9     gem install -N bundler
10
11
12 # Throw-away build stage to reduce size of final image
13 FROM base as build
14
15 # Install packages needed to build gems
16 RUN apt-get update -qq && \
17     apt-get install --no-install-recommends -y build-essential
18
19 # Install application gems
20 COPY Gemfile* .
21 RUN bundle install
22
23
24 # Final stage for app image
25 FROM base
26
27 # Run and own the application files as a non-root user for security
28 RUN useradd ruby --home /app --shell /bin/bash
29 USER ruby:ruby
30
31 # Copy built artifacts: gems, application
32 COPY --from=build /usr/local/bundle /usr/local/bundle
33 COPY --from=build --chown=ruby:ruby /app /app
34
35 # Copy application code
36 COPY --chown=ruby:ruby . .
37
38 # Start the server
39 EXPOSE 8080
40 CMD ["bundle", "exec", "rackup", "--host", "0.0.0.0", "--port", "8080"]
1- Uses the ARG command to set a local variable that will be available within the dockerfile script. This value was imported from the .ruby-version file we created.
2- Selects the base image using the RUBY_VERSION variable from Line 1, assigns the label base to this build stage.
5- The WORKDIR command sets the designated directory within the container as the “present working directory,” if you will, for any subsequent filesystem commands in the script.
8- This line and the next update the gem system within the base stage and install bundler.
13- Starts a second stage with the label build. This stage acts like a sandbox where we will do some work, copy the results of that work to our final stage, and then discard this stage along with the tooling we used to do the work.
16- Updates the Linux system packages in the build stage, and then installs “build-essential.” This is a Linux meta-package that contains the compilers and tools needed to compile source code into executables. This package may be needed by gems that compile native extensions.
20- This line and the next copy Gemfile from our project into the image, and then run bundle install to install gem dependencies.
25- Creates the final stage. This stage goes back to the original base, which is much smaller because it doesn’t have bundler or build-essential installed.
28- Adds a “ruby” user to the container. This is the user our app will use to avoid operating as root. Specifies this user’s home directory as /app and specifies the user’s preferred shell (bash).
29- Sets the container’s user as “ruby.”
32- Copies the installed gems from the build stage to the final stage.
33- Copies all files in the build stage /app directory to the final stage, and makes the “ruby” user the owner of the directory and its contents.
36- Copies the demo application files from our system into the container, and makes the “ruby” user the owner of the files.
39- Instructs the container to “listen” on port 8080 (the standard port for Fly.io).
40- The command that runs when the container/virtual machine spins up. In this case, it starts our demo app with bundle exec rackup --host 0.0.0.0 --port 8080.
Now let’s look at fly.toml.
fly.toml
This file is much short than the dockerfile since, in this example, there is not a lot to do. In a real production app, there would be more configuration in here, such as non-secret ENV settings.
 1 # fly.toml app configuration file generated for hanami-test on 2023-09-12T18:20:33-04:00
 2 #
 3 # See https://fly.io/docs/reference/configuration/ for information about how to use this file.
 4 #
 5
 6 app = "<YOUR_APP_NAME>"
 7 primary_region = "<REGION>"
 8
 9 [build]
10
11 [http_service]
12   internal_port = 8080
13   force_https = true
14   auto_stop_machines = true
15   auto_start_machines = true
16   min_machines_running = 0
17   processes = ["app"]
6- This line will show the app name you assigned with fly launch.
7- The region you selected.
12- The port that will be served to the world when the virtual machine is running.
13- Forces all connections to use https (Fly.io provides the SSL certificate).
14- This line and the following two lines manage our app’s scaling. By default, Fly.io provisions two machines for every app. These lines allow them to “scale to zero” when idle, and up to the total number of provisioned machines (two, at the moment) based on demand. Neat!
17- We have not specified any processes explicitly, so this line states that all virtual machines in this Fly.io app cluster belong to the default app process group. If this were a Rails app, for example, we might configure separate process groups to serve the web and, say, run chron jobs or Sidekiq workers.
And that’s it! We’re ready to run fly deploy! When I ran it the first time, the build process took two minutes or so. You can follow the whole process via the output in the terminal. Here is an excerpt from my build showing the image being built using the dockerfile script.
 => [internal] load build definition from Dockerfile
 => => transferring dockerfile: 973B
 => [internal] load .dockerignore
 => => transferring context: 104B
 => [internal] load metadata for docker.io/library/ruby:3.2.2-slim
 => [internal] load build context
 => => transferring context: 12.45kB
 => [base 1/3] FROM docker.io/library/ruby:3.2.2-slim@sha256:b86f08332ea5f9b73c427018f28af83628c139567cc72823270cac6ab056c4dc
 => => resolve docker.io/library/ruby:3.2.2-slim@sha256:b86f08332ea5f9b73c427018f28af83628c139567cc72823270cac6ab056c4dc
 => => sha256:360eba32fa65016e0d558c6af176db31a202e9a6071666f9b629cb8ba6ccedf0 29.12MB / 29.12MB
 => => sha256:f4acd8d05bbc8059429b82bb86761da2edb27566433da1701da054de15d0351c 13.84MB / 13.84MB
 => => sha256:28fab83683a6365cab991f87efd22b02ab6ea438ccccb00ee4239ac6046f6468 197B / 197B
 => => sha256:b1b52a1bc24f87c04f82e35758a34d9f9c74b21912c50fcd68d799d8ae22eb1b 34.83MB / 34.83MB
 => => sha256:7253d00afd18ea8181333df895225cdedab4f8b96caeafa0a85d473cf8f5b0cd 175B / 175B
 => => sha256:b86f08332ea5f9b73c427018f28af83628c139567cc72823270cac6ab056c4dc 1.86kB / 1.86kB
 => => sha256:087f471df1c090a3688a27b46e8b4977bf28e330ac127fd758b5184316ccf7b0 1.37kB / 1.37kB
 => => sha256:c2ac71ef3cf61faae98bc6f89895b389315b37d6a23a58c704909a76d3829d43 6.99kB / 6.99kB
 => => extracting sha256:360eba32fa65016e0d558c6af176db31a202e9a6071666f9b629cb8ba6ccedf0
 => => extracting sha256:f4acd8d05bbc8059429b82bb86761da2edb27566433da1701da054de15d0351c
 => => extracting sha256:28fab83683a6365cab991f87efd22b02ab6ea438ccccb00ee4239ac6046f6468
 => => extracting sha256:b1b52a1bc24f87c04f82e35758a34d9f9c74b21912c50fcd68d799d8ae22eb1b
 => => extracting sha256:7253d00afd18ea8181333df895225cdedab4f8b96caeafa0a85d473cf8f5b0cd
 => [base 2/3] WORKDIR /app
 => [base 3/3] RUN gem update --system --no-document &&     gem install -N bundler
 => [build 1/3] RUN apt-get update -qq &&     apt-get install --no-install-recommends -y build-essential
 => [stage-2 1/4] RUN useradd ruby --home /app --shell /bin/bash
 => [build 2/3] COPY Gemfile* .
 => [build 3/3] RUN bundle install
 => [stage-2 2/4] COPY --from=build /usr/local/bundle /usr/local/bundle
 => [stage-2 3/4] COPY --from=build --chown=ruby:ruby /app /app
 => [stage-2 4/4] COPY --chown=ruby:ruby . .
 => exporting to image
 => => exporting layers
 => => writing image sha256:588e654997a3ed593064223e88c8cec31ef8bc0eed2f02d078347f095b1eaa6c
 => => naming to registry.fly.io/hanami-test:deployment-01HA5RCTYH8T26N5NXCBTGXR1K
Once your build completes successfully, you can use fly apps open to open your app in the browser: “Hello from Hanami.” Congratulations!
Caveats
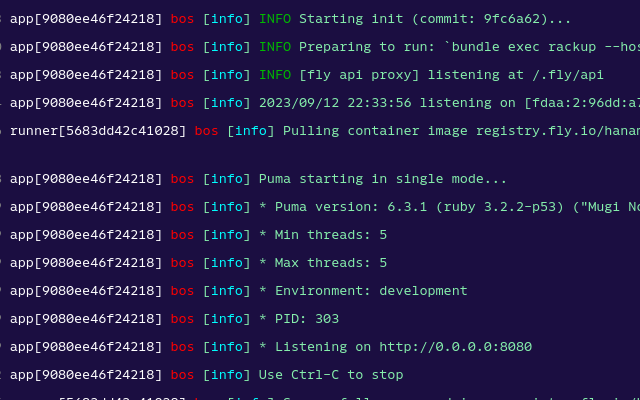
Be advised, there is plenty more to be done before running an actual app in production. For example, you will notice that in the screenshot I used for my cover image, Puma is running in development mode (:/), since that is the default and we have not provided an ENV variable specifying otherwise. For this we could add an [env] block for non-secret values to our fly.toml or our dockerfile, or we could manage all of our ENV variables through the Fly.io dashboard. Likewise, we can set secret values on the command line, with fly secrets set MY_SECRET=sauce, or through the Fly.io dashboard.
Finally, we have not implemented persistence. I suspect this will require a more complicated dockerfile to get everything working properly. I guess I’ll try that next . . .
Wrap Up
The goal of this article was to walk through the process of deploying a basic app, learn the steps, see how difficult it is, and locate all the knobs and levers. On that front, I think we can declare this a clear success. I am very impressed with Fly.io so far.
Thank you for coming along!